4 MCPs Every Frontend Dev Should Install Today (Part 1)
TL;DR
Install these 4 MCPs to turn Claude/Cursor into a real teammate:
- Context7: live docs → no outdated APIs
- BrowserMCP: control your browser with real sessions
- Framelink: Figma → accurate React/Tailwind scaffolds
- Shadcn MCP: correct shadcn/ui props, imports, patterns
Intro: Why MCPs Matter for Frontend Vibe Coding
It's 3 PM. You ask Claude for a simple Next.js middleware function. It confidently spits out code using a deprecated API. You spend the next 20 minutes in a debugging rabbit hole, questioning your life choices. This isn't just a bad day; it's a daily tax on your productivity.
Or: you need to test your login flow. You open Playwright docs, write a test script, configure selectors, deal with authentication tokens. 30 minutes gone.
Or: your designer sends a Figma link. You eyeball it, translate spacing and colors manually, hope you got it right. The designer sends feedback. You iterate. Hours wasted.
This is the gap Model Context Protocol (MCP) servers fill.
MCP is Anthropic's standard for connecting AI assistants to external data sources and tools in real-time. Think of it as giving Claude direct access to documentation, browsers, design files, and component libraries—without you copying and pasting or context-switching.
This isn't hype. It's infrastructure. The difference between guessing and knowing. Between 30-minute tasks and 3-minute tasks.
Here's what changes with MCPs:
- Claude knows the actual Next.js 14 API, not outdated training data
- Claude controls your real browser with your logged-in sessions intact
- Claude reads Figma designs directly and generates pixel-perfect components
- Claude uses the latest shadcn/ui component specs, not hallucinated versions
Frontend developers specifically benefit because:
- Frameworks evolve fast: React 19, Next.js 15, Remix—APIs change every quarter. LLM training data lags by months.
- Design handoffs are manual: Translating Figma to code is still a human job. MCP automates it.
- Testing is context-heavy: Real browser sessions, cookies, auth states—headless browsers can't replicate your actual environment.
- Component libraries matter: Using shadcn/ui or Radix correctly requires up-to-date knowledge of props, variants, theming.
In this guide, I'll show you 4 MCP servers that solve these exact problems:
- Context7: Real-time documentation for any framework or library
- BrowserMCP: Automate your actual browser (not a headless instance)
- Framelink Figma MCP: Turn Figma designs into code in one shot
- Shadcn MCP: Accurate shadcn/ui component generation
Each section includes installation code, real Reddit user experiences, and specific use cases. By the end, you'll know which to install first and how to combine them.
Let's start with the one that stops API hallucinations: Context7.
MCP 1: Context7 - Stop API Hallucinations
The Problem: Hallucinated APIs
You're using Supabase. You ask Claude to write a query with realtime() subscriptions. It gives you:
const subscription = supabase
  .from('messages')
  .on('INSERT', payload => console.log(payload))
  .subscribe()
Looks right. Except on() was deprecated in Supabase v2. The correct syntax is .channel().on(). You debug for 20 minutes before finding the v2 migration guide.
This happens because LLMs are trained on historical data. When frameworks update, the training data doesn't. Claude's knowledge cutoff is January 2025—but Next.js 15 shipped in October 2024, React 19 in December 2024. The APIs Claude knows might already be outdated.
Context7 solves this by injecting live documentation into every request.
How Context7 Works
Fetches live docs from 1,000+ libraries, injects them into Claude's context before answering. You get current APIs, not stale training data. Full technical details →
Installation: Quick Setup
For Claude Code:
claude mcp add context7 -- npx @context7/mcp-server
Verify: claude mcp list
For Cursor (~/.cursor/mcp.json or via Settings > MCP):
{
  "mcpServers": {
    "context7": {
      "command": "npx",
      "args": ["@context7/mcp-server"]
    }
  }
}
Restart Cursor after saving.
That's it. No API keys, no auth. The first run will install the npm package, which takes ~30 seconds. After that, it's instant (Context7 installation guide).
Real-World Workflows
Use Case 1: Next.js 15 Middleware
Prompt: "Create Next.js 15 middleware that rate-limits API requests"
Context7 ensures correct Next.js 15 syntax:
// Key parts that Context7 gets right:
import { NextResponse } from 'next/server'  // ✅ Correct import
import type { NextRequest } from 'next/server'

export function middleware(request: NextRequest) {
  const ip = request.ip ?? 'unknown'  // ✅ Next.js 15 API
  // ... rate limiting logic
}

export const config = {
  matcher: '/api/:path*',  // ✅ Updated pattern syntax
}
Use Case 2: Supabase Realtime (v2)
Prompt: "Set up realtime subscription for new messages in Supabase"
// ✅ Context7 uses v2 syntax with .channel() wrapper
const channel = supabase
  .channel('messages')
  .on('postgres_changes', { event: 'INSERT', ... }, handler)
  .subscribe()

// ❌ Without Context7: deprecated .on() directly on supabase object
When Context7 Shines (and When It Doesn't)
Best for:
- Working with rapidly evolving frameworks (Next.js, React, Remix, Astro)
- Using libraries with version-specific breaking changes (Supabase, Prisma, tRPC)
- Building with popular open-source tools that have comprehensive docs (Tailwind, shadcn, Radix)
Limitations:
- Library coverage: Context7 indexes ~1,000 popular libraries. If you're using a niche package, it won't have the docs.
- Not a replacement for official docs: For deep dives, you'll still read documentation yourself. Context7 optimizes for "quick API lookups" during coding.
- Context window usage: Adding documentation consumes tokens. For simple queries, it's overkill.
MCP 2: BrowserMCP - Automate Your Real Browser

The Gap: AI Can't Touch Browsers (Until Now)
You're testing a new checkout flow. You ask Claude to write a Playwright test. It generates:
const browser = await chromium.launch()
const page = await browser.newPage()
await page.goto('https://yourapp.com/checkout')
Clean code. Except: your checkout requires being logged in. Playwright launches a fresh, isolated browser with no cookies or sessions. You now have to script the entire login flow, handle 2FA, deal with CAPTCHA, and maintain authentication tokens.
Or: you're filling out 50 job applications. Each requires navigating forms, uploading resumes, answering questionnaires. You could write a script, but scraping bots get blocked. Cloudflare detects headless browsers. Rate limits trigger.
BrowserMCP solves this by automating your actual browser—the one you're using right now.
BrowserMCP's Unique Angle: Your Real Profile
Chrome extension + MCP server. Controls your actual browser—not headless, not a new profile. Uses your logged-in sessions, bypasses bot detection, runs locally. Architecture details →
Two-Step Setup
Step 1: Install Chrome Extension
- Visit browsermcp.io/install
- Click "Add to Chrome"
- Pin the extension to your toolbar
- When you want to automate a tab, click the extension icon to enable control
Step 2: Configure MCP Server browsermcp.io docs
For Claude Code:
claude mcp add browsermcp -- npx @browsermcp/mcp@latest
For Cursor (~/.cursor/mcp.json):
{
  "mcpServers": {
    "browsermcp": {
      "command": "npx",
      "args": ["@browsermcp/mcp@latest"]
    }
  }
}
Important: BrowserMCP controls only the tab where you've enabled the extension. Open multiple tabs if you need parallel workflows.
Practical Scenarios
Scenario 1: End-to-End Testing with Real Sessions
You're testing a dashboard that requires OAuth login. Without BrowserMCP, you'd write Playwright code to:
- Navigate to login page
- Handle OAuth redirect
- Store tokens
- Inject them into requests
With BrowserMCP, you're already logged in. Prompt:
"Navigate to localhost:3000/dashboard, click the 'Export Data' button, wait for download, and screenshot the success message"
BrowserMCP executes in your browser using your session. No auth scripting needed.
Scenario 2: Scraping Authenticated Content
You need to extract data from your company's internal dashboard (sales metrics, user comments, whatever). Traditional scrapers require you to programmatically authenticate. With BrowserMCP, you're already authenticated. No auth scripting. No bot detection. Just your real browser doing real things.
Prompt: "Navigate to this youtube video and extract all the comments to a JSON file"
BrowserMCP uses your logged-in session to access the data.
Key Features
BrowserMCP exposes these MCP tools:
- navigate: Go to a URL
- click: Perform clicks on elements
- type: Input text into forms
- screenshot: Capture visual state
- snapshot: Capture accessibility tree (so AI can reference elements by label instead of brittle CSS selectors)
- get_console_logs: Retrieve browser console output for debugging
- wait, hover, press_key, drag_drop: Full interaction toolkit
BrowserMCP Best Practices
- Use a dedicated test profile: Create a separate Chrome profile for automation to avoid mixing personal browsing
- Enable extension only when needed: Prevents accidental automation of unrelated tabs
- Be explicit in prompts: Instead of "test my app," say "navigate to /login, enter
test@example.comand password123, submit, verify dashboard loads" - Review AI actions: Monitor the first few runs to ensure correct behavior
- Handle timeouts gracefully: Some pages load slowly—use explicit
waitcommands
Security:
- Never automate with production credentials—use test accounts
- Avoid hardcoding passwords in prompts—use environment variables
When to Use BrowserMCP (and When Not To)
Best for:
- Local development testing with authenticated sessions
- Form automation where you're already logged in
- Scraping content from sites you have legitimate access to
- Avoiding bot detection on sites you're authorized to use
Not for:
- CI/CD headless pipelines (use Playwright/Puppeteer directly)
- Cross-browser testing (BrowserMCP is Chrome-only)
- Mass automation at scale (designed for developer workflows, not enterprise scraping)
MCP 3: Framelink Figma MCP - Figma to Code in One Shot
The Design Handoff Problem
Your designer sends a Figma link. You open it, eyeball the spacing, copy hex codes, estimate font sizes, screenshot images. You write CSS, tweak values, refresh the browser. The designer reviews: "The padding should be 24px, not 20px. And that's not the right blue."
You go back. Adjust. Iterate. An hour passes on a single component.
Or: you use a design-to-code tool that analyzes screenshots. It generates something vaguely similar but wrong—hardcoded widths, inline styles, no component structure. You spend more time fixing the output than if you'd coded it manually.
Framelink Figma MCP solves this by giving AI direct access to live Figma design data.
Framelink's Approach: Live Design Data
Connects AI to Figma API. Fetches exact layer hierarchies, precise styling, component metadata, and exports assets—all as data, not pixels. Paste a Figma link, get accurate code. Docs →
Setup & Workflow
Step 1: Create a Figma Personal Access Token
In Figma, go to Profile → Settings → Security → Personal access tokens. Generate a token (e.g., "MCP Access") and copy it.
Step 2: Configure the MCP Server
Add your token to the Framelink MCP configuration.
- For Cursor (
~/.cursor/mcp.json):
{
  "mcpServers": {
    "Framelink MCP for Figma": {
      "command": "npx",
      "args": ["-y", "figma-developer-mcp", "--figma-api-key=YOUR_KEY", "--stdio"]
    }
  }
}
- For Claude Code:
claude mcp add framelink -- npx -y figma-developer-mcp --figma-api-key=YOUR_KEY --stdio
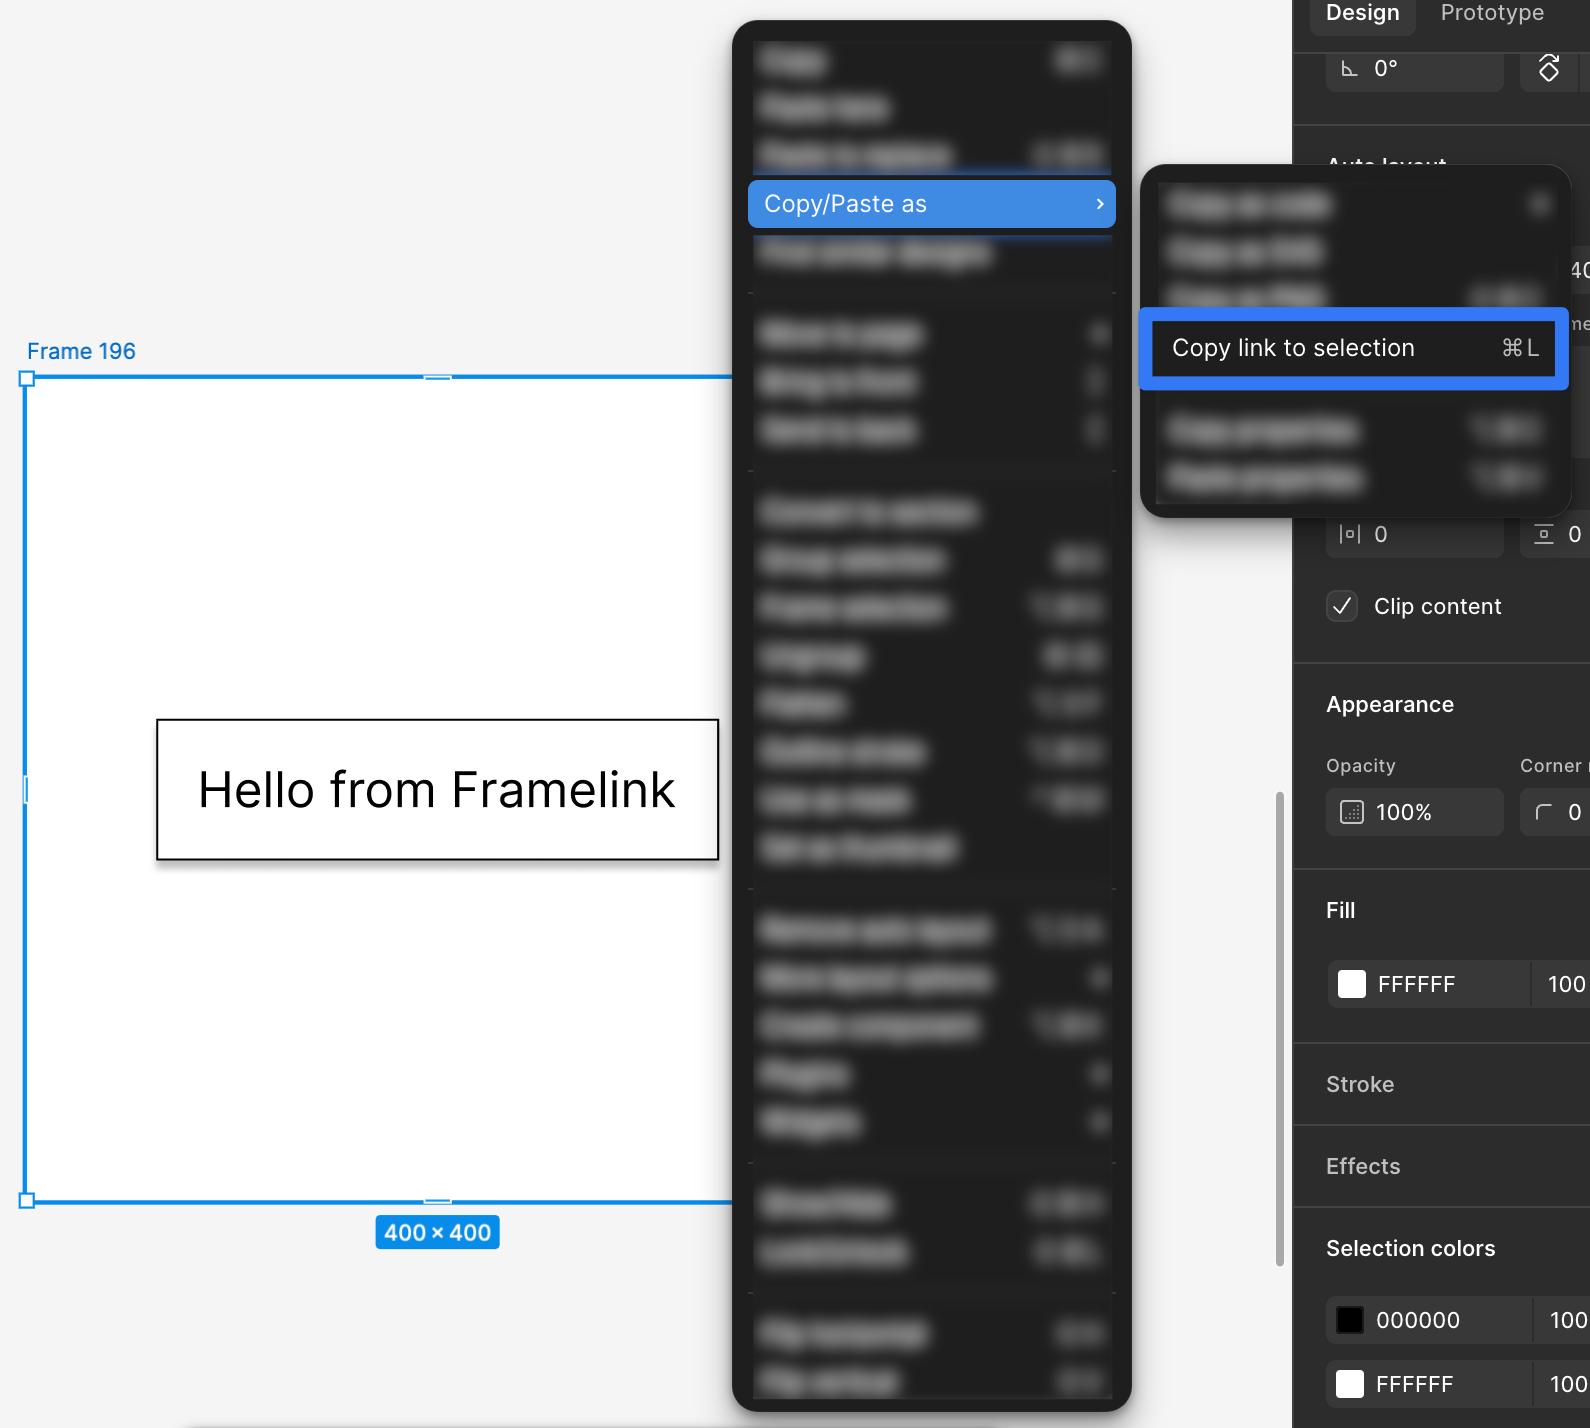
Step 3: Copy Your Figma Design Link
Copy a Figma frame link (right-click the frame or group → Copy link) and paste it into your editor chat.
Step 4: Show Time
Prompt:
"Implement this Figma file for me:
<your_figma_design_url>"
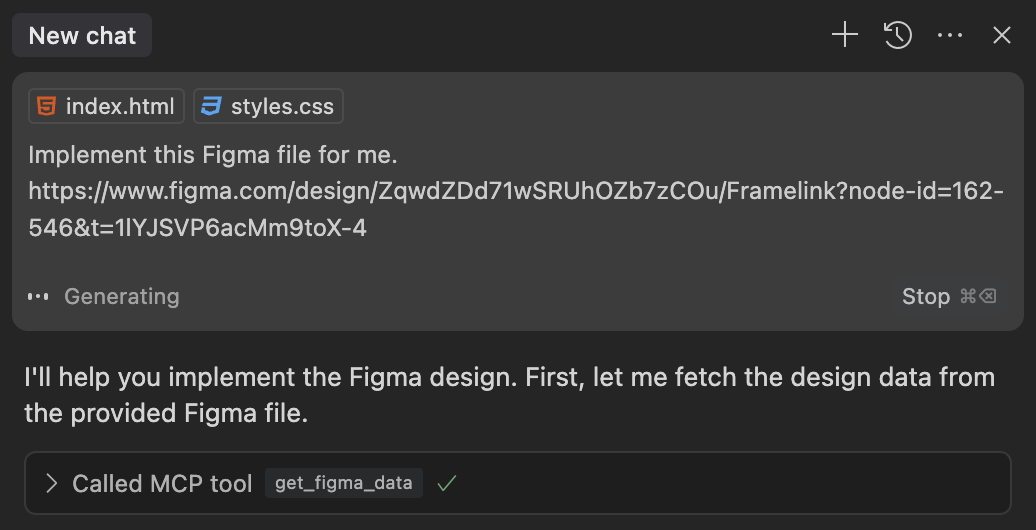
Framelink MCP fetches the design structure, styles, and assets. Claude generates components with accurate spacing, colors, and layout.
The AI can automatically export PNG/SVG assets to
public/(or your configured assets folder) via its image download tools. No manual downloads needed.
When Framelink Shines (and When It Doesn't)
Best for:
- Landing pages and marketing sites with strong visual design
- Dashboard UI with defined component structure
- Design systems where Figma variables map to CSS tokens
- React/Next.js projects (most common use case)
Limitations:
- Not pixel-perfect: Expect 70-90% accuracy. Interactive logic, data fetching, and complex state still require developer work
- Figma API limits: Heavy usage can hit rate limits (implement backoff/retry)
MCP 4: Shadcn MCP - Accurate Component Generation
Shadcn/UI Popularity & The Accuracy Gap
Shadcn/ui has become one of the most popular React component libraries—copy-paste components built on Radix UI primitives with Tailwind styling.
But there's a problem with AI assistants using shadcn/ui: They hallucinate props, variants, and usage patterns.
You ask Claude to generate a shadcn Dialog component. It gives you:
<Dialog open={isOpen} onClose={handleClose}>
  <DialogContent>
    <DialogTitle>Settings</DialogTitle>
  </DialogContent>
</Dialog>
Looks right. Except shadcn Dialog doesn't have onClose—it uses onOpenChange. And you're missing required wrapper components. You debug for 10 minutes consulting the actual docs.
Shadcn MCP eliminates this by connecting AI directly to the shadcn/ui registry.
Shadcn MCP's Smart Solution
Official MCP server with live access to shadcn/ui registry. Browse components, fetch exact TypeScript interfaces, view usage examples, install via natural language. Same access you have on shadcn.io. Official docs →
Dead-Simple Setup
For Claude Code:
claude mcp add --transport http shadcn https://www.shadcn.io/api/mcp
Verify: claude mcp list
For Cursor (~/.cursor/mcp.json):
{
  "mcpServers": {
    "shadcn": {
      "url": "https://www.shadcn.io/api/mcp"
    }
  }
}
What You Can Do
Discover: "Show me all shadcn components available" → Returns live registry list
Inspect: "Show details about the Dialog component" → Returns exact TypeScript props, wrapper components, usage examples
Install: "Add the button, dialog and card components" → Triggers shadcn CLI, installs with proper structure
Build: "Create a settings dialog using the shadcn Dialog component with a form inside"
Multi-Registry Support
Shadcn MCP supports multiple registries via namespaces in components.json:
{
  "registries": {
    "shadcn": "https://ui.shadcn.com/r",
    "@acme": "https://registry.acme.com",
    "@internal": "https://internal.company.com/registry"
  }
}
Now you can prompt:
"Build a login form using @internal/auth-form and shadcn Button"
The AI routes requests across registries, mixing internal components with shadcn/ui primitives (MCP Server docs, Registry MCP docs).
Next Steps: Pick One and Install It Now
Here's the truth: you just spent 15 minutes reading this. Most people will do nothing.
Don't be most people.
Pick one based on your biggest time sink:
- Debugging outdated API syntax? → Context7
- Manually testing logged-in flows? → BrowserMCP
- Translating Figma to code? → Framelink
- Fighting with shadcn props? → Shadcn MCP
Stop reading. Go install one.